
Table of Contents
- How a 3-compartment plastic container overflow filter works
- Step 1: Calculate filter capacity and pump flow from the pond volume
- Step 2: Choose the plastic containers for the filter compartments
- Step 3: Drill staggered overflow holes and fit the pipework
- Step 4: Arrange the filter media in each compartment
- Step 5: Test run and start the biofilter before adding fish
- Step 6: Run and clean the filter regularly
- Frequently asked questions about filtering a fish pond with plastic containers
- Why do you need 3 filter compartments rather than 1 large one?
- How often should all the filter media be cleaned?
- Can I use an old paint container to build a filter?
- Is building a koi pond filter from plastic containers different from an ordinary fish pond?
- Is there a way to build a pond filter without electricity?
- How long before the new filter starts to work effectively?
- Can a white plastic container be used as a filter compartment?
- Does a container filter clear all green water?
- Can I glue PVC pipe directly to the wall of a plastic container?
- Contact ICD Vietnam
- References
Reviewed and updated by ICD - Week 43/2026
Filtering a fish pond with plastic containers means joining 3 containers into an overflow filter: a submersible pump pushes pond water into the coarse filter compartment, the water flows by gravity through the biological compartment and then the fine filter compartment and returns to the pond. The total filter volume should be 10 - 20% of the pond volume (a 2,000-litre pond needs 200 - 400 litres of filter), with a pump strong enough to pass the pond water through the filter every 1.5 - 3 hours.
I am Le Van Thang and I have worked at ICD Vietnam since 2011. Customers who buy plastic containers to build a pond filter usually ask two questions: how many litres should the containers be, and which pump to use. Those two numbers are only the beginning. Most of the home-made filters I have heard about fail somewhere else: overflow holes drilled at the same height so water rises over the container rim, bio media filled in but not run long enough before fish are added, or the biological compartment rinsed with tap water. Choosing capacity and stocking density for the fish tank itself is covered in the article on plastic tanks for fish farming; this guide focuses on the filter.
This guide goes through exactly 6 steps to build a 3-compartment overflow filter from lidded plastic containers, from calculating capacity to regular cleaning. The technical figures come from the koi pond water management guide of Louisiana Sea Grant, the ornamental pond publication of the Southern Regional Aquaculture Center (SRAC) and the FAO guide to recirculating systems. Where something is practical experience rather than a researched threshold, I say so.
How a 3-compartment plastic container overflow filter works
A filter does two jobs: it traps solids such as fish waste and uneaten feed by mechanical filtration, and it converts the toxic ammonia fish excrete into less toxic nitrate with bacteria living on the filter media. A 3-compartment system separates these two jobs into separate containers, so cleaning one compartment does not destroy the bacteria in another.
The flow relies on gravity. A submersible pump pushes dirty water from the pond into compartment 1; when the water level reaches the connecting pipe, it overflows into compartment 2, then compartment 3, and from the last compartment returns to the pond through a separate pipe. The whole system lifts the water only once, at the pump. The FAO guide to recirculating systems gives the same advice: pump the water up only once and let the rest flow by itself, with mechanical filtration always ahead of biological filtration so solids do not clog the places where bacteria live.
The most important part happens in the biological compartment. The koi pond guide from Louisiana Sea Grant (Louisiana State University) describes the three-stage chain above: nitrite in the middle stage is still very toxic and turns the fish’s blood and gills brown, so the biological compartment must carry enough bacteria of both the Nitrosomonas and Nitrobacter groups. Ammonia becomes more toxic when pH exceeds 8, so an alkaline pond needs this compartment to run stably even more.
Compared with buying a commercial filter of the same capacity, plastic containers have three advantages: they are much cheaper, they hold a large volume of filter media and the layout is easy to change when the pond holds more fish. Each compartment shows its sediment when you open the lid, so cleaning is also visual. In return, you take responsibility for the calculation and installation, which is the content of the 6 steps below.
Step 1: Calculate filter capacity and pump flow from the pond volume
The total volume of the 3 filter containers should be about 10 - 20% of the pond volume, and the pump must be strong enough for all the pond water to pass through the filter once in 1.5 - 3 hours. A 2,000-litre pond therefore needs 200 - 400 litres of filter, that is, 3 containers of about 90 - 140 litres, and a pump rated about 670 - 1,330 litres per hour at the real lift height. An example of pairing the filter with a specific fish tank is in the article on raising tilapia in plastic tanks.
To find the pond volume, multiply length x width x average depth (in metres) and then multiply by 1,000. A pond 2 m long, 1 m wide and 1 m deep holds about 2,000 litres. For a pond with sloping sides or a dished base, use the average depth, or count the water as you fill it through a water meter. A tall, narrow container saves floor space but the pump must push higher; a low, wide container is easier to fill with media and easier to clean.
The table below applies the 10 - 20% rule and the 1.5 - 3 hour turnover to some common pond sizes. Pump flow is the real flow once the water has been lifted to the height of the filter containers, usually much lower than the maximum flow printed on the pump box.
| Pond volume | Total filter volume (10 - 20%) | Suggested 3 containers | Real pump flow |
|---|---|---|---|
| 1,000 litres | 100 - 200 litres | 3 containers of 60 - 90 litres | 330 - 670 litres/hour |
| 2,000 litres | 200 - 400 litres | 3 containers of 90 - 140 litres | 670 - 1,330 litres/hour |
| 3,000 litres | 300 - 600 litres | 3 containers of 120 - 220 litres | 1,000 - 2,000 litres/hour |
| 5,000 litres | 500 - 1,000 litres | 3 containers of 220 litres or 2 filter lines | 1,670 - 3,330 litres/hour |
About 1.5 - 3 hours is a working convention, not the only figure. The fishdoc site, which specialises in koi health, gives two common rough estimates: a filter area of about one tenth of the pond area, or pond water passing through the filter every 2 - 3 hours, and notes that each type of media must be calculated separately. For a heavily stocked koi pond, some pond designers writing in POND Trade Magazine advise passing the water through the filter at least once an hour. Some koi farms in Vietnam even advise building a filter up to about one third of the pond volume for heavily stocked koi; this figure has no research behind it but shows that the more fish a pond holds, the more you should lean to the high end of the range.
Choose the pump by real head, not by the number on the box
Pump flow falls as it has to push water higher. FAO calculates pump head as the real height the water is lifted plus the loss through pipes, elbows and fittings. For a container filter, that height is the distance from the pond water surface to the mouth of the inlet pipe in compartment 1, plus the loss of each metre of pipe and each elbow. How to choose: read the pump’s table or performance curve, find the flow that matches the head you calculated, then compare it with the flow range in the table above. Use large pipe and as few elbows as possible, because each elbow costs the pump more flow.
Put the pump at the deepest point of the pond, where sediment settles, and run the filter continuously 24/7 so the bacteria in the biological compartment do not lack oxygen. Louisiana Sea Grant also gives a limit worth remembering: do not stock more fish than can survive a 12-hour power cut; to stock more densely, you need backup power or backup oxygen.
The second approach matches the FAO recommendation of placing the pump after mechanical filtration so solids are not chopped into fine particles that are hard to filter. In that case choose a pump no stronger than the flow of water arriving by gravity in the last compartment, otherwise the pump compartment will run dry and the pump will run dry with it.
Step 2: Choose the plastic containers for the filter compartments
Choose virgin HDPE or PP containers with thick, ribbed walls and a tight-fitting lid, and dark in colour if possible. A container that once held paint, oil or chemicals should not be used as a filter compartment, because residues remain in the plastic wall and slowly seep into the pond water.
HDPE (plastic No. 2) is tough, resists impact well and can be used outdoors when it contains a UV-resistant additive or carbon black, usually in dark-coloured containers. Polyethylene without additives is gradually made brittle by UV light, so a container placed in the sun should be shaded or chosen with UV stabilisation. PP (plastic No. 5) is stiffer and often used for food containers, but turns brittle faster than HDPE in long sun exposure, so place it under a roof. A used container should only be used when you are certain it once held food and its origin is known.
The container wall must be stiff enough not to bulge when filled with water and media. The lid keeps rain, leaves and debris out and also blocks light: light entering the filter compartment makes algae grow on the media. For that reason pond keepers prefer blue, black and grey containers.
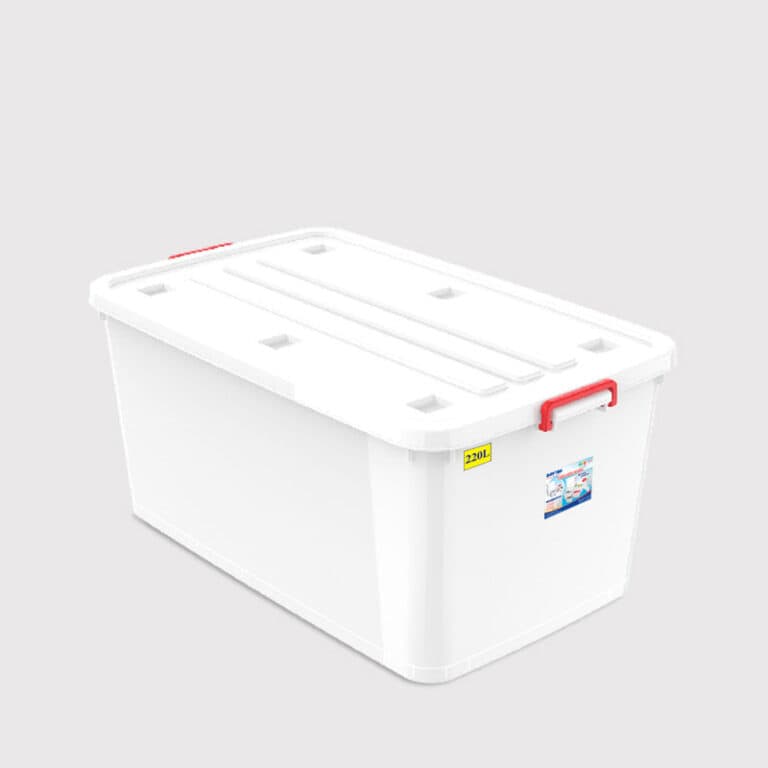
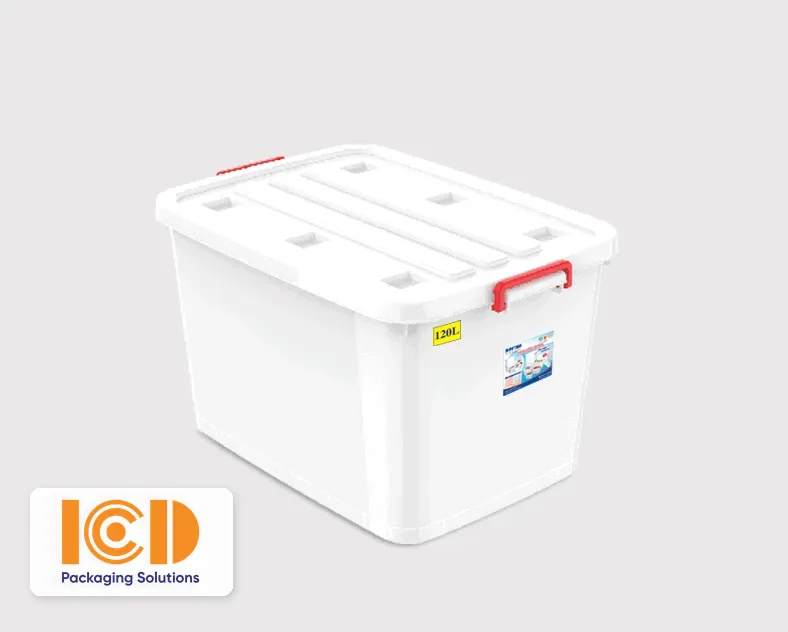
ICD Vietnam’s lidded container line is made from virgin PP, in sizes of 55, 90, 120, 140 and 220 litres. The 140-litre code (No.214) measures 78.5 x 56 x 47 cm and the 220-litre code (No.853) measures 102 x 60.5 x 46 cm; their low, wide shape makes it easy to arrange filter media. These containers are bright white, so when building a filter always keep the lid on and place it in the shade to limit algae. ICD Vietnam plastic containers carry a 12-month warranty under the policy published on the website.
One detail often forgotten is the load. Each litre of water weighs about 1 kg, so 3 containers of 120 litres full of water already weigh about 360 kg, not counting ceramic rings, lava rock and the containers themselves. Put the filter on a flat concrete floor or a solid base; on a terrace, put it close to a beam or load-bearing wall.
Step 3: Drill staggered overflow holes and fit the pipework
Each container needs at most 3 kinds of hole: a connecting hole to the next compartment in the upper part of the wall, a bottom drain hole with a valve for flushing sediment and, in the last container, an outlet hole back to the pond. The outlet hole of an earlier compartment must be about 3 - 5 cm higher than the outlet hole of the next one; this difference is what makes the water flow by itself without another pump.
- Rinse all 3 containers with water; do not use strong detergents.
- Place the 3 containers in their fixed position, close together in the order compartment 1, compartment 2, compartment 3, and level the top of each container carefully.
- Mark the connecting hole from compartment 1 to compartment 2 about 5 - 10 cm below the container rim, the hole from compartment 2 to compartment 3 3 - 5 cm lower, and the outlet hole back to the pond in compartment 3 lower again.
- Drill with a hole saw matching the outer diameter of the bulkhead fitting, drilling slowly so the hole edge is round and does not crack.
- Fit the bulkhead fitting with rubber gaskets on both faces, tighten by hand, and only then connect the PVC pipe to the fitting.
- Fit a bottom drain with a valve on each container and a flow control valve on the supply pipe from the pump into compartment 1.
The overflow pipe between containers should have a larger diameter than the pump’s discharge pipe so water overflows in time and does not rise over the container rim. You can add a downward elbow at the end of the overflow pipe inside the container, with the elbow mouth a little below the water surface, so floating debris does not drift into the next compartment. Wait for the glue to dry as the glue maker instructs, then fill each container with water to check for leaks before placing the media.
Step 4: Arrange the filter media in each compartment
Compartment 1 holds coarse sediment media (brush media, Jmat), compartment 2 holds the carrier for bacteria (ceramic rings, lava rock, Kaldnes beads) and compartment 3 holds fine filter wool and can add activated carbon. This order cannot be reversed: biological media placed before the coarse filter would be coated by sediment in a few days.
Compartment 1: coarse filtration and settling
Hang brush media vertically, packed densely in the upper half of the container, leaving the lower part as a settling zone flushed through the bottom valve. Jmat (Japanese matting) laid horizontally under the brushes traps more of the medium-sized sediment. SRAC lists leaf traps, foam and settling tanks among the mechanical filters commonly used for ornamental ponds, and does not recommend sand filters or swimming-pool style cartridges because they clog very quickly and are hard to clean. This compartment gets dirty fastest, so put it where it is easiest to reach.
Compartment 2: biological filtration
Ceramic rings, lava rock and Kaldnes plastic beads are all places for nitrifying bacteria to attach. The thing to remember is not to pack them tightly. FAO notes that a good biofilter needs a large surface area but must still leave plenty of space for water to pass, otherwise the media will be clogged by organic matter. Put the media in mesh bags or perforated plastic trays so you can lift them out to inspect without disturbing the whole compartment.
Kaldnes beads are a moving-bed type of filter: according to FAO, the beads must be kept in constant motion by the air from the aerator, which keeps them self-cleaning and removes the need for backwashing, but they do not trap fine sediment. If you use Kaldnes, put the air outlet at the bottom of compartment 2 and still keep compartment 3 to clear the water. Ceramic rings and lava rock sit still and do not need strong aeration, but hold back some extra fine sediment.
Compartment 3: fine filtration
Fine filter wool in several layers in the last compartment traps the remaining suspended particles. Activated carbon in a mesh bag, laid on the wool, helps remove colour and odour; carbon saturates after a while and has to be replaced, not washed. When the wool is dirty, wash or replace it, because this compartment mainly clarifies the water and the main bacteria are already in compartment 2.
Step 5: Test run and start the biofilter before adding fish
Run the filter without fish for at least a few hours to check for leaks and the overflow, then let the system run for another 2 - 3 weeks, sometimes up to 30 days, so nitrifying bacteria can develop fully. During this time stock only a few healthy fish and feed lightly.
The University of Florida (UF/IFAS) guidance on recirculating systems advises running the system without fish for two to four days to check for leaks, pump flow and connections. With a self-built filter, this is when to adjust the supply valve so water overflows evenly through all 3 compartments while the water level in compartment 1 still stays a few centimetres below the container rim.
Tap water contains chlorine, and chlorine kills the bacteria in the filter as well. SRAC says tap water treated with liquid or gas chlorine can lose its chlorine by itself after about a week in the sun, faster with aeration; if the water utility uses chloramine you must use a dechlorinator sold at aquarium shops.
Louisiana Sea Grant describes how to tell when the filter has matured: ammonia rises gradually then drops close to zero within about 36 hours, which is when Nitrosomonas are numerous enough; nitrite then spikes and falls sharply as Nitrobacter catch up. When both ammonia and nitrite are low, the filter can handle a light load. From then on, each time you add fish or raise feed, keep the increase below about one third of the previous level; according to the same document, a mature filter usually adapts to such an increase within about 72 hours.
Step 6: Run and clean the filter regularly
The basic schedule is to flush the sediment from compartment 1 weekly through the bottom valve, rinse the brush media and Jmat monthly with pond water itself, wash or replace the filter wool when dirty, and avoid touching the biological media. In hot weather when fish eat more, clean more often; in cold weather less often.
Biological media should only be rinsed when water flow has slowed markedly or thick sludge has built up. When rinsing, dip and swirl gently in a bucket of pond water, do not scrub clean and do not use tap water, so most of the bacterial layer is kept. Do not rinse all 3 compartments on the same day. FAO gives the biofilter rinsing frequency in fish farms as anywhere from weekly to monthly, depending on the amount of feed going into the system; an ornamental pond with few fish is much less frequent.
A filter keeps ammonia and nitrite stable, but nitrate still accumulates gradually, so you still need to change part of the water regularly; pond keepers often change about 20 - 30% a week, which is practical experience rather than a standard threshold. The replacement water must be dechlorinated as in step 5.
Nitrifying bacteria consume the water’s alkalinity. SRAC states that a biofilter works best at pH 7 - 8 and alkalinity above 50 mg/L; the Louisiana Sea Grant document advises that when alkalinity is below about 100 mg CaCO3/L you should add baking soda (sodium bicarbonate) or change part of the water so filtration stays stable. The table below collects the problems commonly seen when running a home-made filter.
| Symptom | Common cause | How to fix |
|---|---|---|
| Water overflows the container rim | Overflow pipe too small, coarse filter media clogged | Use a larger overflow pipe, flush the sediment and rinse the brush media |
| Water green like moss | Phytoplankton grows faster than the filtration rate | Shade the pond, cut feeding, consider a UV light |
| Fish stop eating, sluggish | Ammonia rises from overfeeding or too many fish | Stop feeding for a few days, change part of the water |
| Fish gasping at the surface | High nitrite or lack of oxygen | Increase aeration, change water, check the biological compartment |
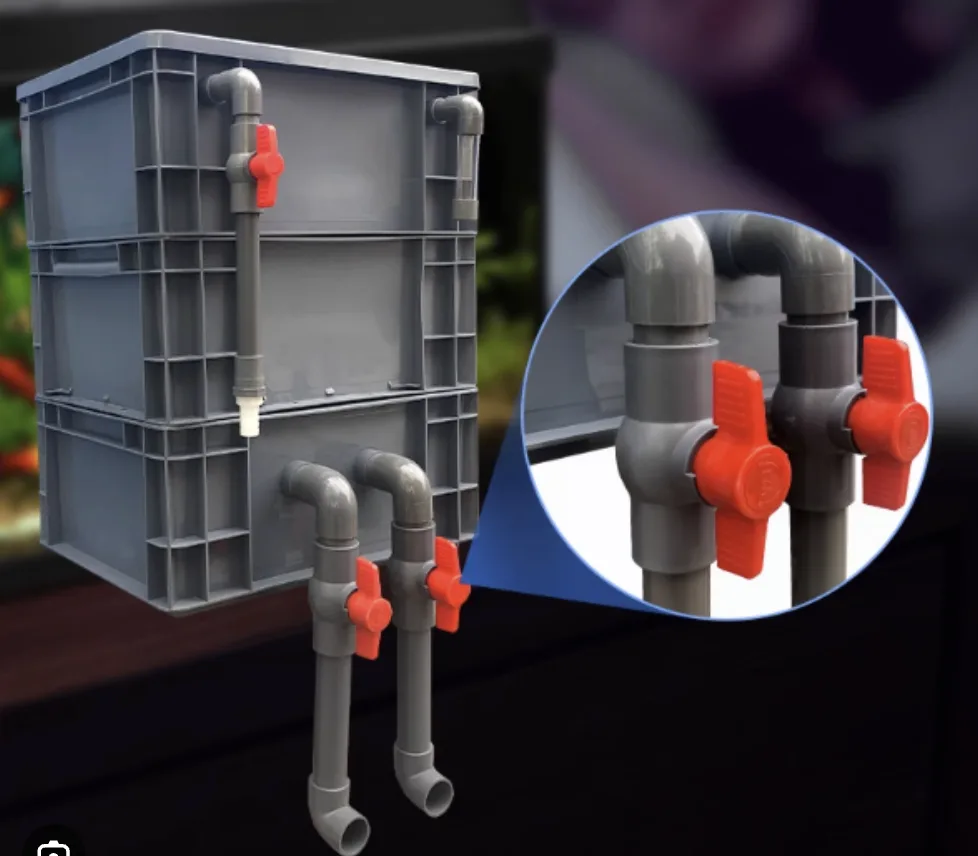
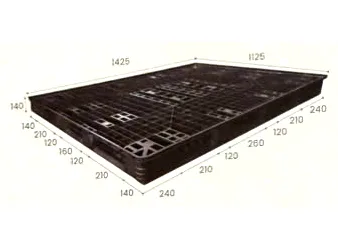
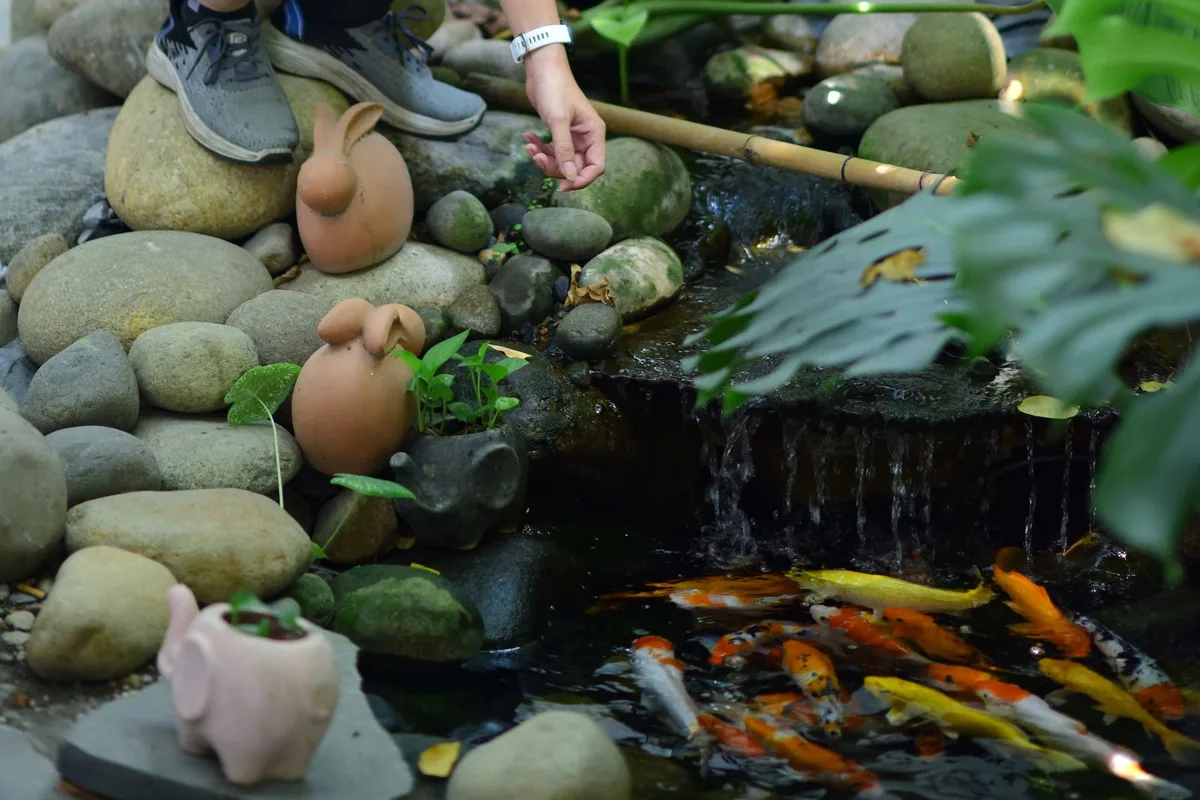
The photo above shows a stacked-tier variant: instead of placing the 3 containers side by side, the containers are stacked to save floor space, with water pumped up to the top container and then flowing down through each tier. This type suits a narrow yard, but the lower containers are harder to clean and the stack must sit on a flat, solid floor because each tier full of water is very heavy.
Frequently asked questions about filtering a fish pond with plastic containers
Why do you need 3 filter compartments rather than 1 large one?
Splitting into 3 compartments separates the roles of coarse filtration, biological filtration and fine filtration. Sediment is held in the first compartment so it does not coat the biological media, and cleaning the dirtiest compartment does not remove the bacteria in the middle one.
How often should all the filter media be cleaned?
Do not clean everything at once, especially biological media such as ceramic rings and lava rock, because you would lose many beneficial bacteria. Rinse the coarse compartment often, rinse the biological compartment gently with pond water only when really needed, and wash or replace the wool in the fine compartment when dirty.
Can I use an old paint container to build a filter?
No. Paint and solvent residues in the plastic wall are very hard to wash out completely and can slowly seep into the pond water. Use new plastic containers, or old containers you are sure once held food.
Is building a koi pond filter from plastic containers different from an ordinary fish pond?
The principle is the same, but a koi pond needs a stronger filter because koi are larger, eat more and produce more waste. Choose a total filter volume at the high end (close to 20% of the pond volume), a pump that passes the pond water through the filter about every 1.5 hours or faster, and a coarse compartment large enough because koi often stir up the bottom and lift sediment.
Is there a way to build a pond filter without electricity?
An overflow filter from plastic containers still needs a pump to lift water from the pond to the first compartment. For a small pond, you can reduce dependence on electricity by planting many aquatic plants, stocking few fish and changing water more often, but the effect on ammonia is not as good as a biofilter running continuously.
How long before the new filter starts to work effectively?
The mechanical part works as soon as the pump runs. The biological part needs about 2 - 3 weeks, sometimes up to 30 days, for nitrifying bacteria to develop fully. During this time feed the fish lightly and change water more often.
Can a white plastic container be used as a filter compartment?
Yes, but keep the lid tightly closed and place it in the shade. Light passing through the wall and the opening makes algae grow on the filter media; a dark container limits this better.
Does a container filter clear all green water?
Usually not completely. Phytoplankton are very small, most pass through mechanical filter media and multiply faster than the rate at which water passes through the filter. To get clear water, shade the pond, cut the amount of feed or add a UV light.
Can I glue PVC pipe directly to the wall of a plastic container?
No. The wall of an HDPE or PP container is very hard to glue, and the joint tends to peel after a while. Use a bulkhead fitting with a rubber gasket; PVC glue is only for joining pipe to fittings.
Contact ICD Vietnam
ICD Vietnam Industrial Manufacturing Co., Ltd - advice on lidded plastic containers for filter compartments and fish tanks by pond volume.
Hotline: 0983 797 186 / 090 345 9186
Email: sales@icdvietnam.com.vn
ICD Vietnam plastic containers carry a 12-month warranty under the warranty and repair policy published on the website.
References
- Malone, R. F. and Rusch, K. A. (1998), Your Koi Pond: A Comprehensive Guide to Water Quality Management, Louisiana Sea Grant College Program, Louisiana State University: nitrifying bacteria, filter start-up time, alkalinity, algae, power cuts.
- Masser, M. P., Water Gardens (SRAC 435), Oklahoma State University Extension: mechanical and biological filtration for ornamental ponds, pH and alkalinity, dechlorinating tap water.
- Bregnballe, J., A Guide to Recirculation Aquaculture, FAO and Eurofish (2015): mechanical filtration before biological filtration, pump head, moving-bed filters, filter rinsing, backup systems.
- UF/IFAS, Fish Health Management Considerations in Recirculating Aquaculture Systems, Part 3: running the system before adding fish.
- Fishdoc, Biological filtration and filter media: estimating filter size and the time for water to pass through the filter.
- Wallace, K., Filtration, Circulation, Aeration and Cleaning, POND Trade Magazine (2014): koi pond circulation rate.
- Wikipedia, Polyethylene: UV ageing, cannot be glued without surface treatment; the Polypropylene article from the same source notes that the PP surface is slippery so many common glues do not stick.
- Dimensions of the 140-litre and 220-litre lidded containers: ICD Vietnam product catalogue, checked on 16 October 2026.